Have you ever had a hard drive failure on your laptop? Of course there is.
How do you deal with these useless chunks of metal when you replace the failed hard drive? Maybe just throw it in the trash.
Ok, why not recycle it?
“But what can I do after recycling?†There are definitely many people asking.
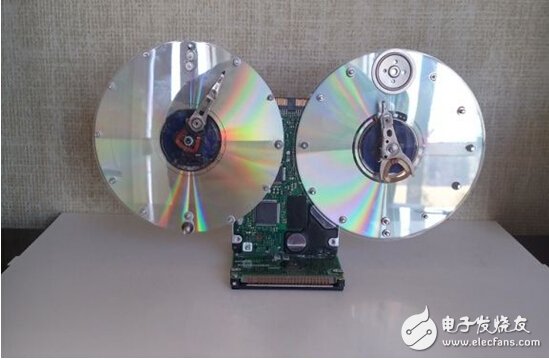
Can you turn it into a geek/technical double-sided clock?
Here's a tutorial that will show you how to turn a two-time hard drive into a stylish clock instead of one.
Step 1: What do we need?
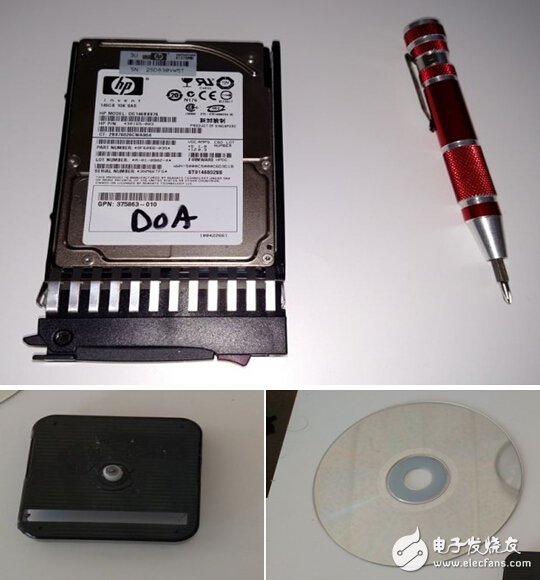
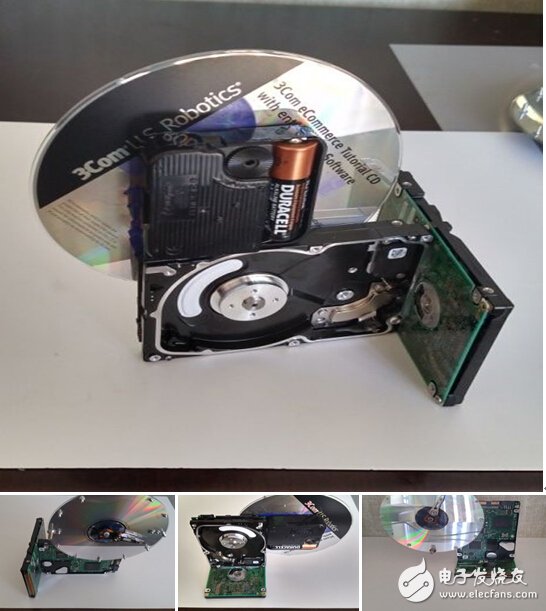
supply:
· Of course, you need two hard drives. 2.5 hard drive and 3.5 can be the same!
· Two independent clockwork components.
· Two CDs. It is best not to have scratches.
· A variety of small screws
· Two AA batteries
· Super strong glue
· Epoxy resin
tool:
· Mini Star Set Screwdriver Head Position
· Scorpion
· Drill 1/16†– optional
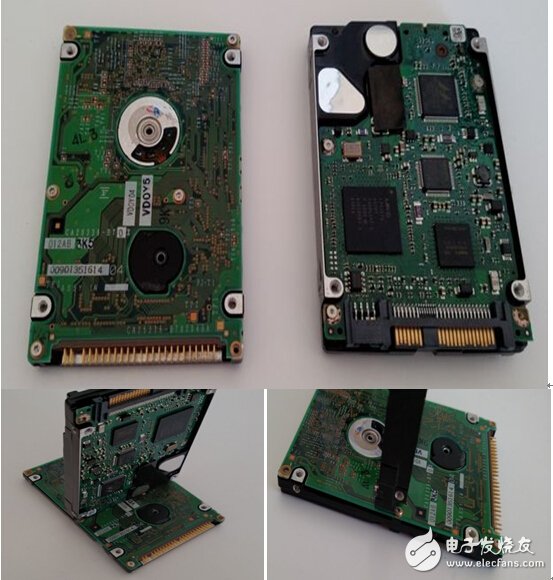
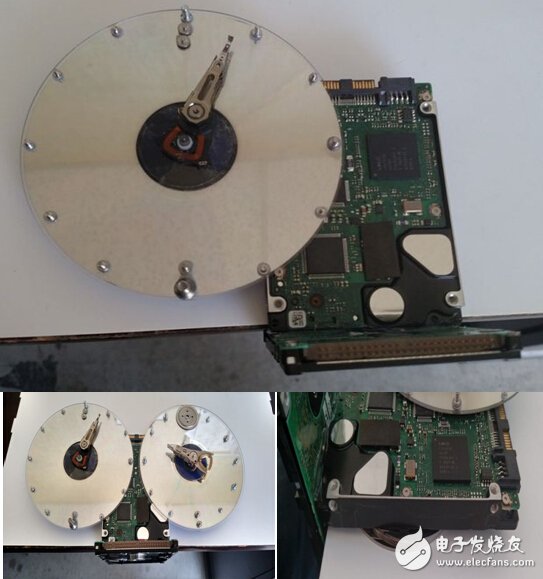
Step 2: Unpack the hard drive
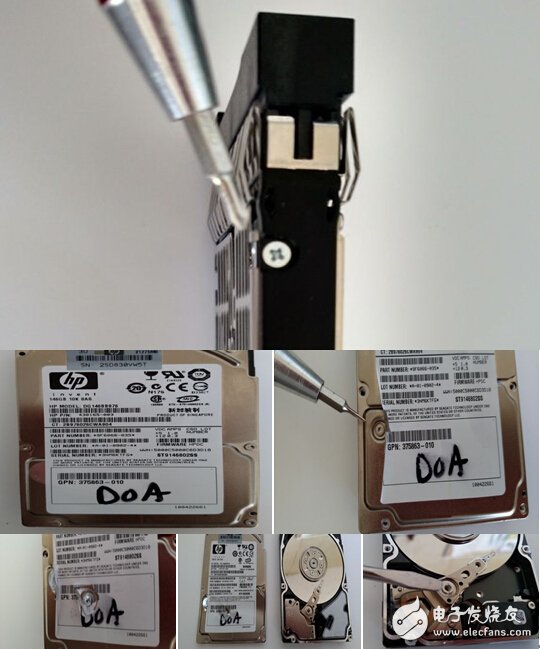
Use a screwdriver to remove all the small screws from the top and sides of the hard drive. Some screws are hidden under the label, so it is recommended to use a screwdriver to scrape along the label and feel the hidden screws. This is easier than trying to strip the entire label.
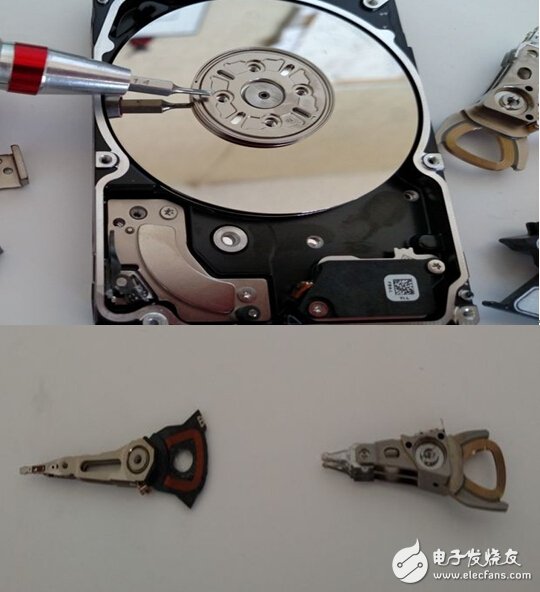
Remove the metal cover from the top of the drive. After opening, remove the screws from the swing arm cover, swing arm and disc spindle. Set all the parts to one side.
This article is selected from the electronic enthusiast "Smart Medical Special", more quality content, download now

Step 3: Attach the clock face

Apply some epoxy to the surface of the clock and attach it to the surface of the CD to the clock. Center the clock spindle with the center of the hole in the CD.
Repeat two units.
Step 4: Set the location
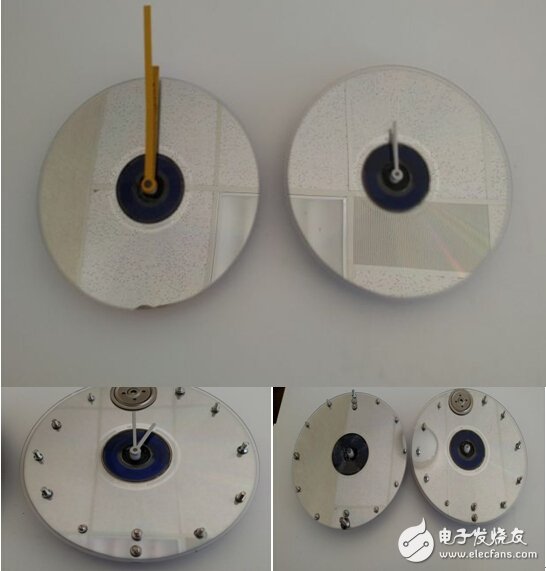
When the epoxy is dry, point the clock to the clock on the pointer at 12:00.
1. Grab a small screw with tweezers.
2. Use glue to the screw head. Carefully place the nail head on the CD at 12:00.
3. Let the glue solidify.
4. Gently pick up the clock and use the dial on the back to set the clock time to 1:00.
5. Repeat the process of bonding and adhering the screw to the front, but this time at the 1:00 position.
6. Repeat this for all remaining time until the clock face is complete.
7. The second CD repeats the entire step.
You now have two clock faces with a variety of screws to calculate the hour on one side and the minute on the other side (in 5 minute increments).
Step 5: Additional handles
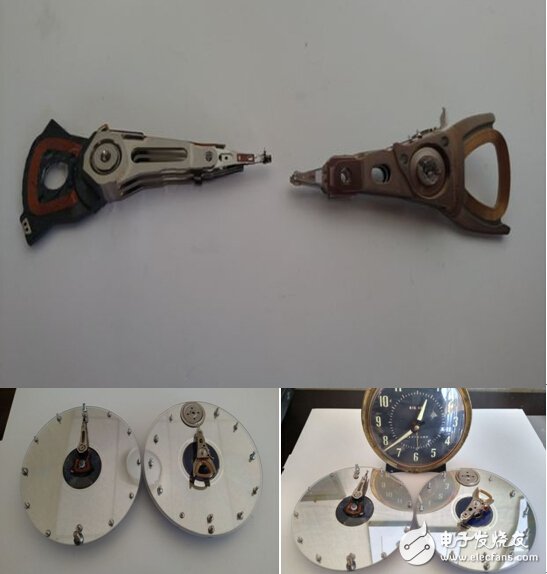
This step will be the most unpredictable. Not all hard drives have the same arm.
Check the swing arm removed from both hard drives. Some have holes at the end that may or may not fit on the clock spindle.
If the end is solid, drill a hole large enough to fit the main shaft for an hour or a minute. In my case, one arm fits exactly to the hour. The second swing arm fits the pivot point of the spindle to the minute.
1. Insert the battery into two clocks.
2. Carefully use the super glue (so you will not accidentally stick the minute spindle to the one-hour spindle), and the main axis of each axis of the glue is at 12 o'clock.
3. Carefully check that both arms are set to 12 points.
Monitor your arms for movement. The hour should be displayed on one side and the minute on the other side.
Pick up to completely dry.
Step 6: Infrastructure
These two hard drive housings will be used as bases.
Run the even bead epoxy along the flat end of one of the drivers. The end of the connector.
Connect the other driver board to the board together.
Create an inverted "T" by pressing the epoxy end perpendicular to the other drive.
Set aside to dry completely.
Step 7: Install the first clock to the base
Put the base aside.
Set the appropriate clock face (hours or minutes, depending on which side you are facing). Queue the top edge of the structure with the top edge of the clock mechanism.
Make a note of where the spring strikes the structure.
Remove the clock face.
Use super glue to connect the edge of the CD to the front structure.
Press the clock back onto the base with glue.
Let the glue dry.
Step 8: Install the second clock on the base
Lay the back of the base over the edge of the table or counter.
Lay the second clock to the correct position in the structure.
If the CD does not touch the base, since the spring is harder than the hard disk, pad the base with something until the clock can be placed flat on the counter and the CD touches the base.
Remove the second clock.
Apply a superglue along the edge of the base along the clock.
Apply super glue to the CD in contact with the base.
Put it down to dry completely.
Step 9: Stand up
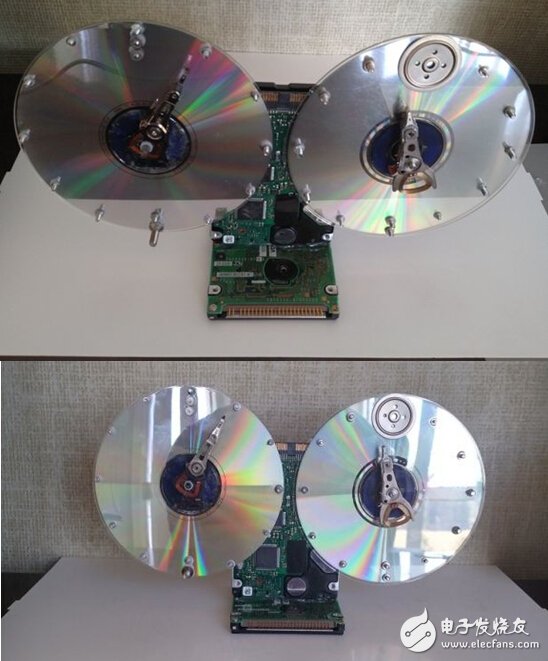
Put the finished clock up on the base.
Now you can create a double-sided clock from the recycled hard drive.
For Fire Extinguisher Use, Drop the auto fire extinguisher ball to extinguishing the fire.
Fire Extinguisher Drone,Drone Fire Extinguisher,Forest Firefighting Drones,Drone For Fire Department Use
shenzhen GC Electronics Co.,Ltd. , https://www.jmrdrone.com